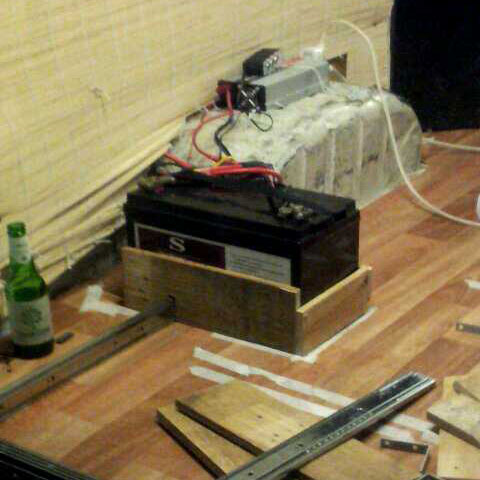
Solar and dual battery setup for glamping
| Client: | Personal project | ||
| Built: | 11.2015 | ||
| Work |
|
Final Specs |
|
Introduction
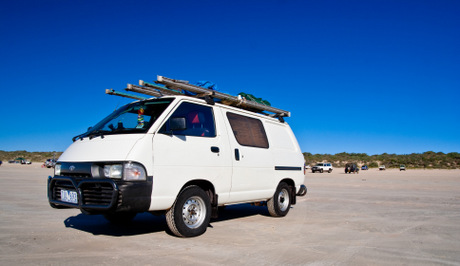
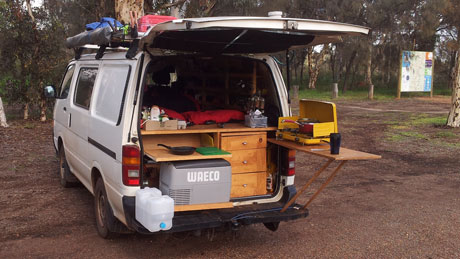
The solar setup was a part of a budget camper I've built for some long term camping that I've done together with my partner.
This build took some ideas of a Van I owned before, with the goal of offering a lot more convenience than what I had prior.
Requirements
- Suitable power availability to:
- Run a fridge overnight
- Recharge enough by solar to keep going for a few days
- Run decent lighting
- Run laptop and other conveniences
- Offer usable lighting inside and out
- House battery charging off alternator in case of:
- Bad weather
- Heavy power use after dark
- Solar panel failure
- Automatic disconnect from main battery
Basic principles
The built and setup based on knowledge I've acquired over the years (more futher down). These were the core principles behind it:
- It's far easier/cheaper to reduce power consumption
- Use dedicated 12V equipment:
- Dedicated Waeco fridge (3way systems are not as efficient)
- DC to DC laptop chargers
- 12V Fan
- Use LEDs for lighting
- KISS - keep it simple, stupid
- Buy once cry once. Going too cheap will cost more
- Research before assuming unknowns
- Be conservative with the battery
- Keep an eye on the voltage (avoid dropping below 12V)
- Don't rely on automatic voltage cut-offs
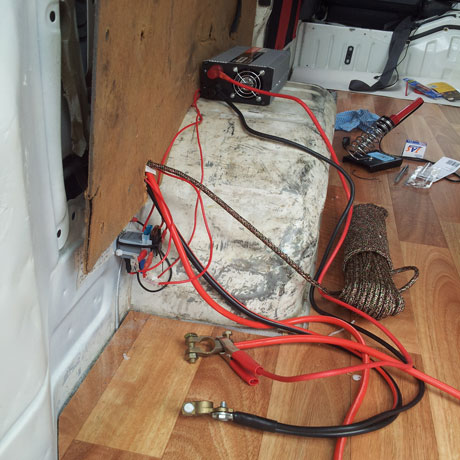
- Keep wires short
- Low voltage DC systems are sensitive to voltage drop
- Poka Yoke (mistake proofing)
- Automate the charge circuit (my old van used a manual battery switch)
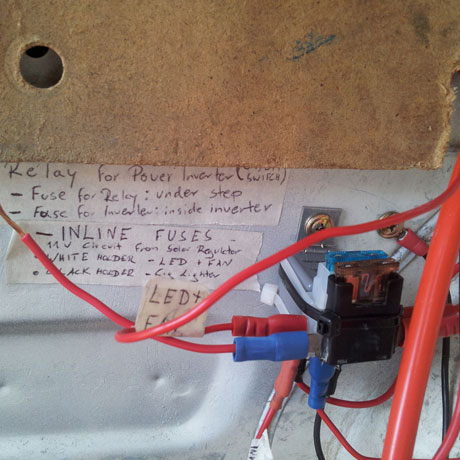
- Use correctly rated fuses for each circuit
- Place circuits in a way they are accessible (and label them)
- Install connectors so they won't short circuit by accident (female connectors supply, male connectors draw)
- Make it as convenient as possible
- Place 12V and 240V outlets wherever there's a demand for them.
- Place switches wherever convenient (especially for the power inverter).
Common misconceptions
A camper is not that dissimilar to an off-grid house setup. While most love the idea of a solar setup, there are misconceptions that people have about this technology.
Having built and extensively used a similar van has helped avoiding the most common mistakes.
Wattage
The most misunderstood concept is simply Wattage.
It starts with the surprise you see in people when you tell them that a 2400W hair dryer or kettle won't have a chance to run off a most power inverters. Even if one understands the most basic wattage ratings and principles, this continues with actual ratings and the number printed on equipment.
Electric Motors
These are particularly problematic as they have a far higher inrush current (start up) than is written on the label. This is particularly true for compressors (especially on fridges) as they often have to overcome a lot of internal resistance to complete their first stroke. On top of that, they are electronically noisy which can very easily trip the overload protection sensitive power supplies (particularly power inverters).
An example that stung me with my previous camper was the thought that I could run a little bar fridge off a power inverter. In reality, even a pure sine wave Inverter with a rating 600W/1200W surge rating struggled to run a bar fridge that was rated at 90W.
Supply and storage ratings
This is a very misleading rating that can catch out many as manufacturers will write down the numbers that sound the most appealing.
Solar Panels for instance are rated on their raw output (without a solar charge controller), when perfectly clean, on a clear day at midday, with perfect orientation on the equator. Real world numbers won't get anywhere close to the rated output and will drop further once a solar charge controller is hooked up.
Batteries are not much better as their rated capacity is far beyond their usable capacity. Many batteries will rapidly degrade if they are cycled to their limit.
Automatic voltage cut-off a feature found in a lot of larger 12V equipment. The promise is that the equipment will shut off when battery voltage would drop too low. While it works reliably, it should only be a last resort as cut-offs are too low for most batteries (often 10V or below) and will damage the battery if they are run down to such low levels.
As such, it's far better to have voltage readers in view and either recharge the battery or switch off the eqipment manually.
Battery Chemistry and Charging
If it wasn't complicated enough, not only are there different battery chemistries, each have their own special needs and problems.
Standard Lead acid car batteries are unsuitable for discharging below 80% capacity and can release dangerous hydrogen gas.
GEL batteries while made for large cycles, can't require a special charger as they get damaged if charged of a car alternator or when a large current draw is applied.
Lithium ION batteries are prohibitively expensive and are sensitive to high temperatures (the van was used in the Pilbara were temperatures can reach 50C).
The last common battery type for these conversions is AGM which are a modified lead acid battery that are a hybrid between GEL and normal Lead acid batteries. While their usable capacity is a lower than GEL batteries, they are far less sensitive to how they are charged and how much current they can supply.
The confusion continues with modern cars as some have "smart" alternators that run on much lower voltages to improve fuel economy. These will always require a smart charger as they might not supply enough voltage to charge up an auxilary battery.
With the van being a Toyota Hiace from the late 90s, the choice fell on an AGM battery and a simple dual battery controller that would join car and aux battery when the engine is running (voltage beyond 12.8V).
While even this system poses some disadvantages, it proved to be the best compromise and still works well 3 and 30.000km years later. It also has the advantage that I can recharge my main battery off the aux battery and jump start myself if needed.
Retrospective
While I'm happy with the build, it's not perfect. This is what went wrong and What I would change next time.What failed so far?
- LED light strip failure.
One LED light strip had a short circuit in it from factory and blew out one of my potentiometers (this is also how I learned how sensitive these are). - LED light strip failure No.2
My second light strip that failed was mounted outside and needed replacement after 2 years of use. Luckily these are not expensive. - Power Inverter - blown MosFet
The no name power inverter (I had a similar one before that worked fine) overheated and blew a MosFet. That has been replaced with a Projecta that has intelligent cooling and has worked fine since.
I still intend on fixing the broken inverter and fit more cooling as this inverter is less sensitive tripping the overload protection when using power tools.
What would I change or do different next time?
Given the money these would be things I'd do different or will upgrade in the future:- Swap from the cheap poti's to PWM controllers to dim the LEDs.
- Another change I'd like to do is the use of a proper fuse box instead of inline fuse holders.
- Differently coloured wires.
- Ideally the camper could do with a bigger battery, however that would also add more weight.
- A neat addition would be the installation of a 240V inlet and a battery charger. However I have staid so little on powered camp sites that it only see very little use.
- A built in 12V water pump for showers would be great.

